First Steps
This tutorial explains how to assign a Digital Product Passport and how to display it automatically when tapping an item.
- NFC tags
- Your TenantID
- An account with at least user permissions
The first step is to find the DPP information. Before linking a product to a DPP template, you need to know which information is required.
- Go to enrolui and log in with your account.
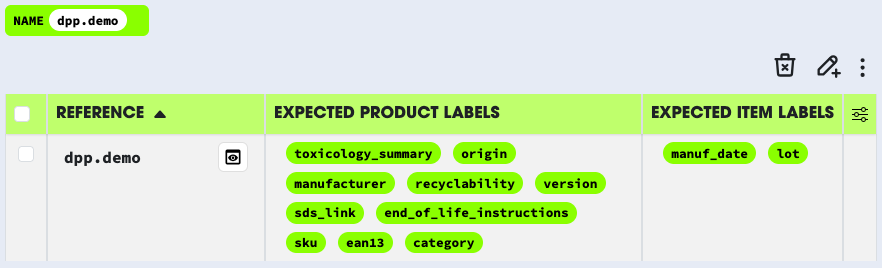
- Navigate to the
DPP Templatepage. - Here, you can find the expected label titles for both products and items.
The second step is to link a product to a DPP template and fill in the required information.
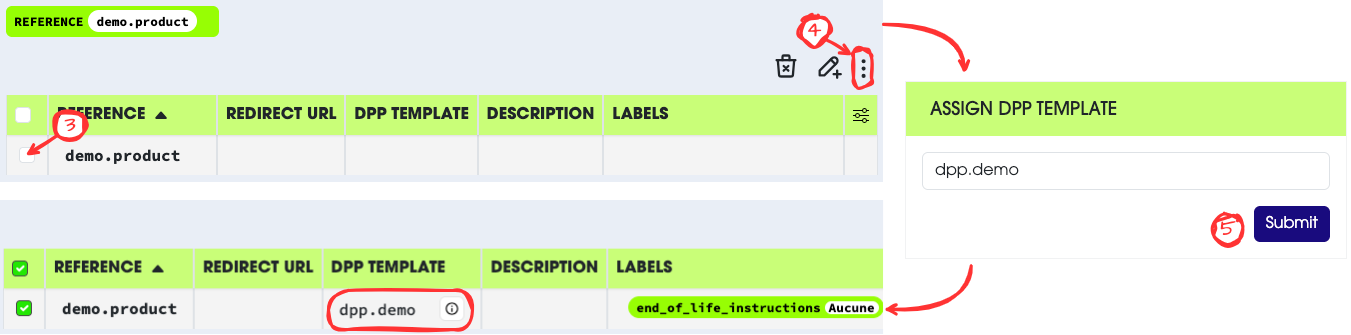
- Go to enrolui and log in with your account.
- Go to the
Productpage. - Select the product you want to assign a DPP to.
- In the action menu, select
Assign DPP Template. - Assign the template to the product.
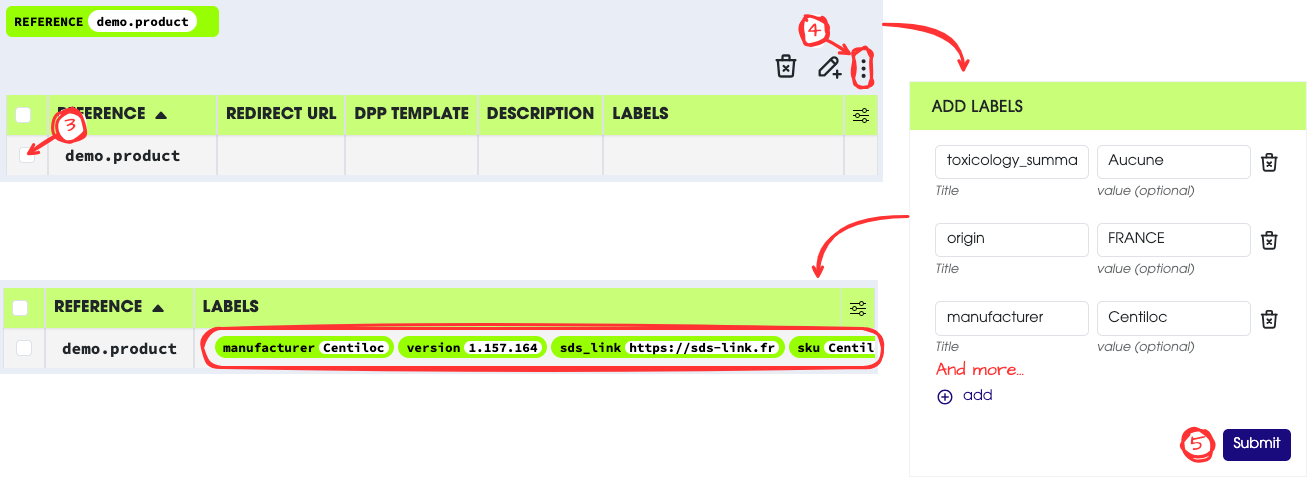
- Go to enrolui and log in with your account.
- Go to the
Productpage. - Select the product you want to assign the DPP to.
- In the action menu, select
Add Labels. - Add the labels required by the DPP template.
Reminder: label titles are listed in the DPP information.
Some DPP templates define components. You can add component information for your product:
- Go to enrolui and log in with your account.
- Go to the
Productpage. - Select the product you want to assign the DPP to.
- In the action menu, select
Update DPP components. - Add the components related to your product.
(More information here)
The final step is to link a product to items. This allows the system to associate each item with a DPP template through the product.
The easiest way to assign a product and DPP labels to multiple items is to use the enrolment flow.
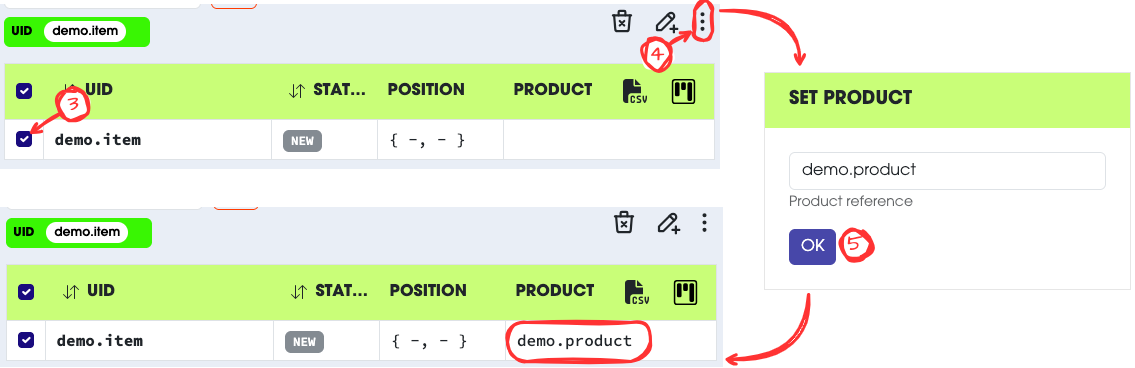
- Go to centui and log in with your account.
- Go to the
Itempage. - Select the item you want to assign a product to.
- In the action menu, select
Set Product. - Enter the product reference and save.
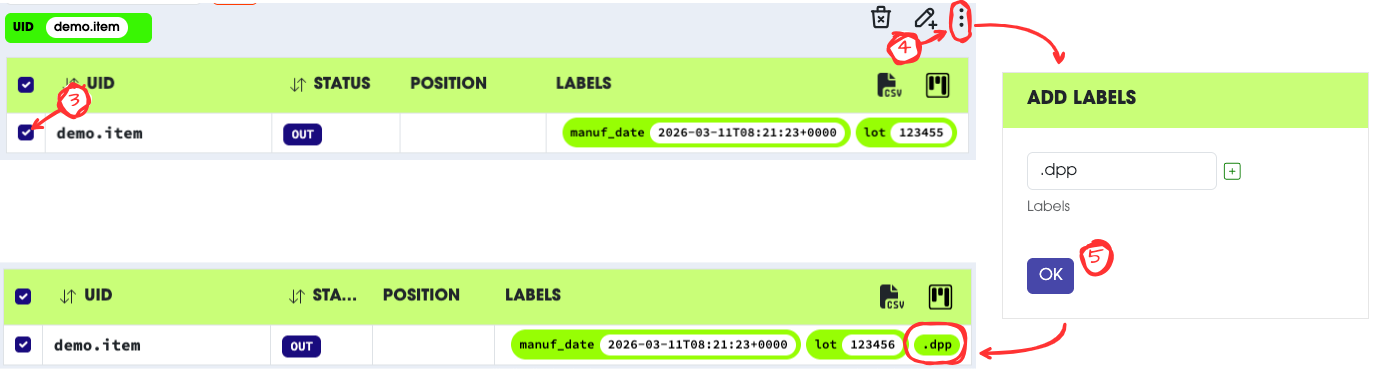
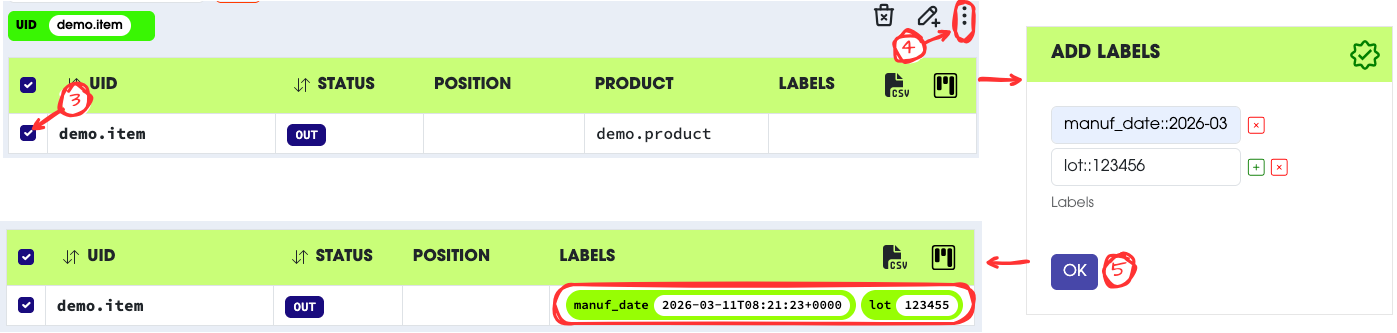
- Go to centui and log in with your account.
- Go to the
Itempage. - Select the item you want to assign the DPP to.
- In the action menu, select
Add Labels. - Add the labels required by the DPP template.
Reminder: label titles are listed in the DPP information.
When tapping an item, you can choose to automatically redirect to the DPP page by adding the .dpp label to the item.
This action will overwrite any previous redirection configuration.
From now on, tapping an NFC tag will redirect to the DPP page.
- Go to centui and log in with your account.
- Go to the
Itempage. - Select the item you want to configure.
- In the action menu, select
Add Labels. - Add the
.dpplabel.