First Steps
This tutorial shows how to get a first feedback on a freshly received Board connected in WiFi.
- A Centiloc Gateway
- Your TenantID
- Having an account with user rights at least
In order to connect your board(s) to your gateway, you need to follow the following diagrams:
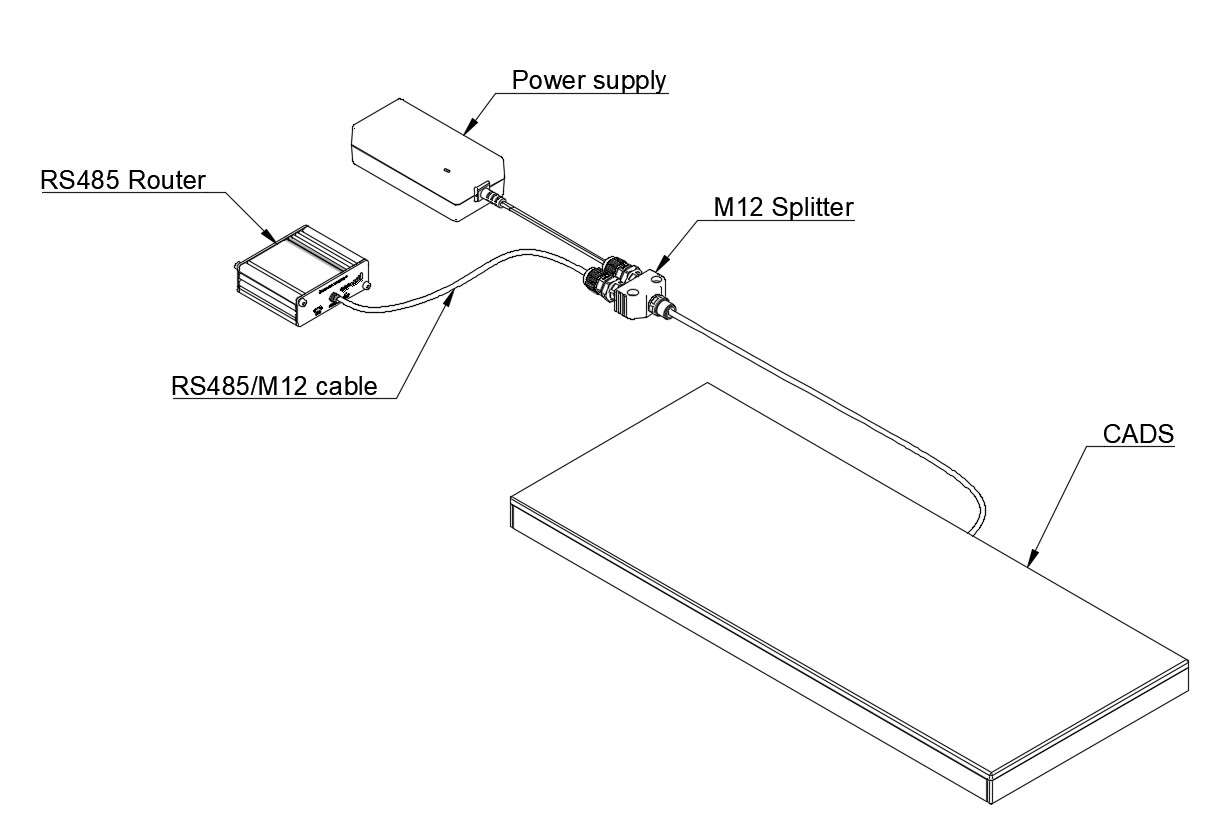
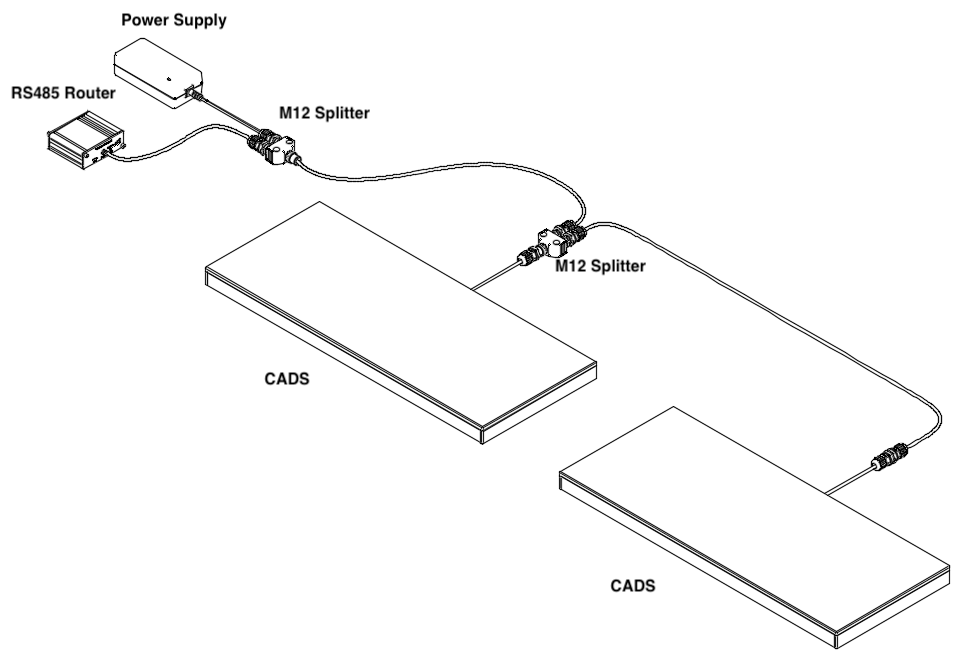
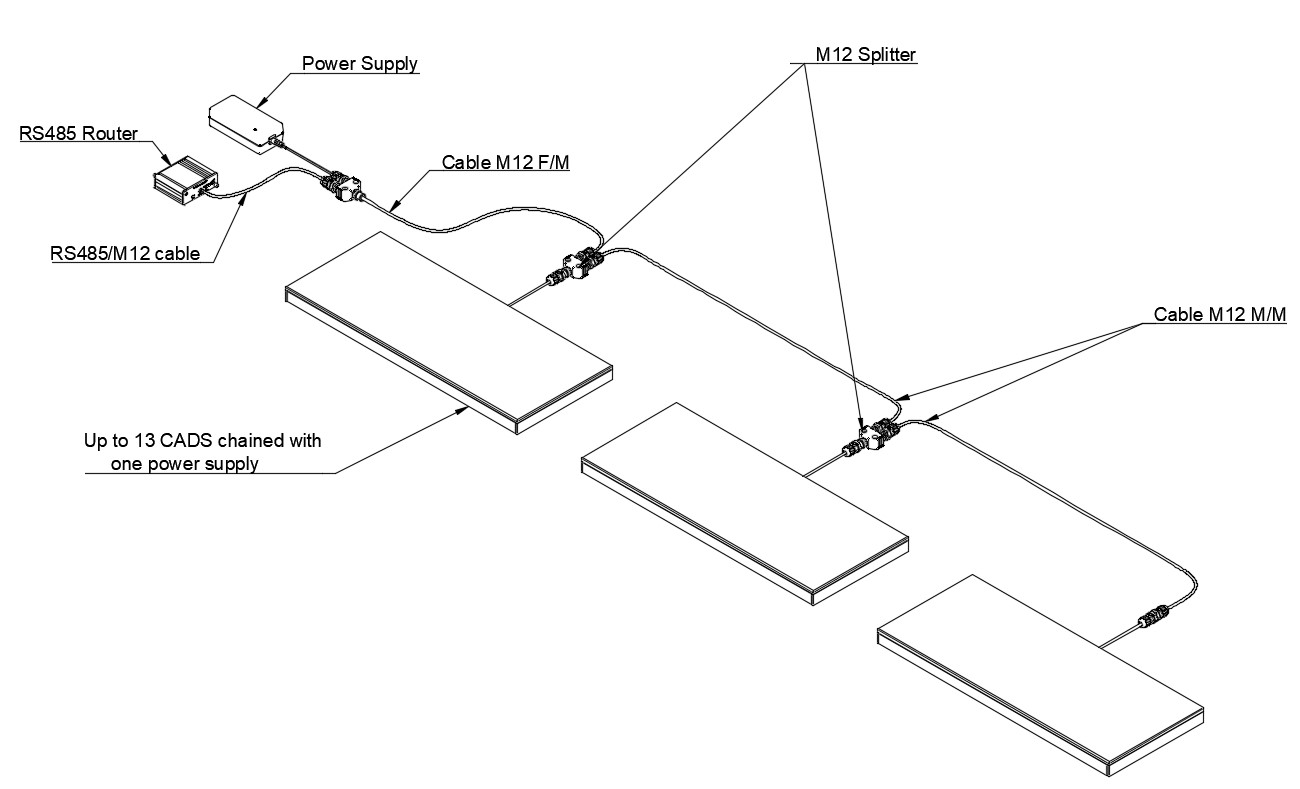
Your first Centui connection is described in previous section.
Let’s browse to https://demo.centui.centiloc.com, and log with your configured account.
Digi IX10 is a full-featured cellular router from DIGI company. It can operate on public and private LTE networks, with features to assist in network control and management, such as dual SIMs for failover connectivity, VLAN support, load balancing between cellular and Ethernet WANs.
The firmware of router has been customized by Centiloc to act as a Gateway between RS485 serial devices and the external network.
In order to configure a digigate, you need to connect first a computer on the digigate network. Once connected, you can browse its IP Address and access the configuration page using HTTP and port 8080 (http:\\ip_address:8080).
Otherwise, you can directly connect your computer to the digigate using an ethernet cable, the digigate configuration interface is reachable at http:\\192.168.210.1:8080.
Admnistrator credentials have been changed to restrict access to sensitive settings and data. A proprietary login page must be used instead to configure the gateway. Accessing to this page requires the use of credentials which are hardware dependent.
- username:
centiloc- default password: Unique diversified password - Contact the Centiloc support team.
Once logged, you are redirected to the Centiloc configuration page giving access to:
- MQTT configuration
- Network settings
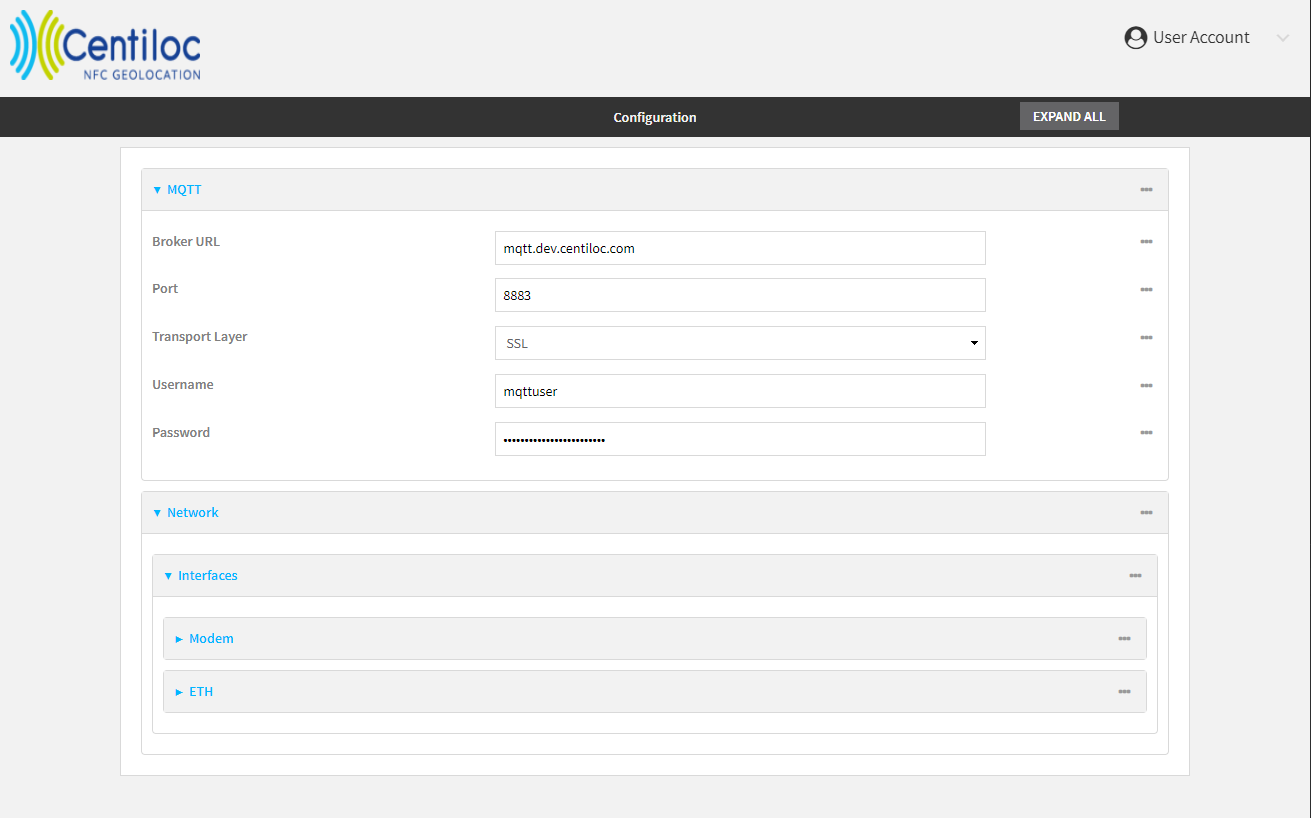
The MQTT section allows to change the MQTT parameters. MQTT (for Message Queuing Telemetry Transport) is the protocol used by the digigate to communicate with the cloud services over the internet.
Parameters are: broker url, tcp port used, transport scheme, username and password for password-based authentication.
In this section, you can so update the URL to the target Geocore platform.
The parameters to use a Data Platform hosted by Centiloc will be given by the Centiloc upon delivery.
Please note thatSSLoption can only be applied if the X509 certificate of the target host is signed by Centiloc.
The Network section is dedicated to internet connectivity.
A Digigate can be connected to the internet using either a cellular connection or ethernet or both.
This part is an abstract of the DIGI system configuration. Only parameters relevant for connectivity are still available.
If for some reason, the sections available on the Centiloc configuration page are not sufficient to setup the Digigate connectivity, please contact the Centiloc support team.
In order to configure a cloudgate, you need to connect a computer on the cloudgate network. Once connected, you can browse its IP Address.
Otherwise, you can directly connect your computer to the cloudgate using an ethernet cable, the cloudgate configuration interface is reachable at 192.168.1.1.
The login requires the following credentials:
- username:
admin - default password:
Centiloc#13
In case you access the cloudgate from a shared network, don’t forget to use ahttps:URL, specially if you update admin password.
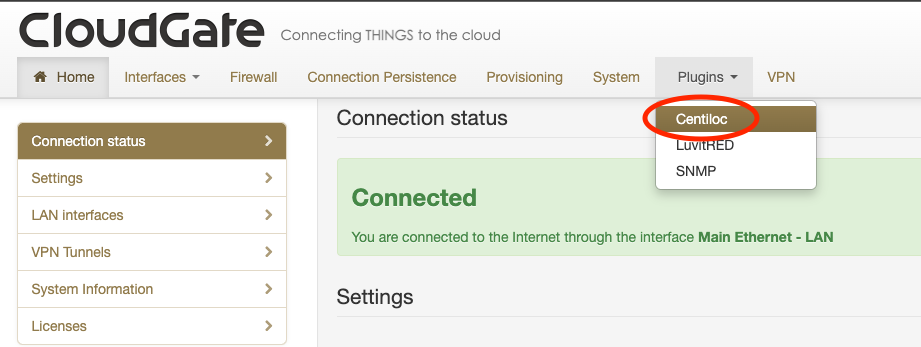
Once logged, find and enter Centiloc plugin:
In the Centiloc plugin, you can update the URL to the target Geocore platform.
In hosted cloud, port is always 8883. OnPremise, the configuration may differ.
Finally, please note that SSL option can only be applied if the X509 certificate of the target host is signed by Centiloc.
Changing
gwuserand its password will make reconnection impossible to Geocore platform hosted by Centiloc.Contact support team to retrieve a working configuration to Ceniloc hosted Geocore platform.
