Configure Ethernet
You can use centui to change how your Centiloc board connects to the network using Ethernet.
- A Centiloc board with ethernet
- Your Tenant ID
- A user account with at least User permissions
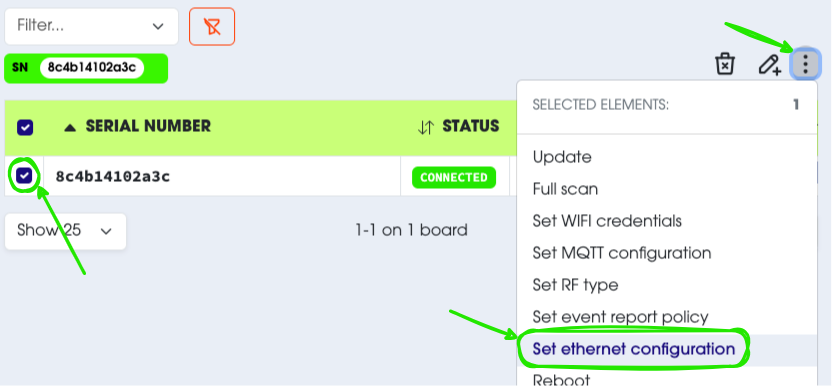
First, follow the First Steps guide to log in, open the boards page, and find the serial number of the board you want to configure.
The board must be CONNECTED before you can change its settings.
- On the boards page, select the board (or several boards) you want to configure.
- Choose the action Set Ethernet configuration.
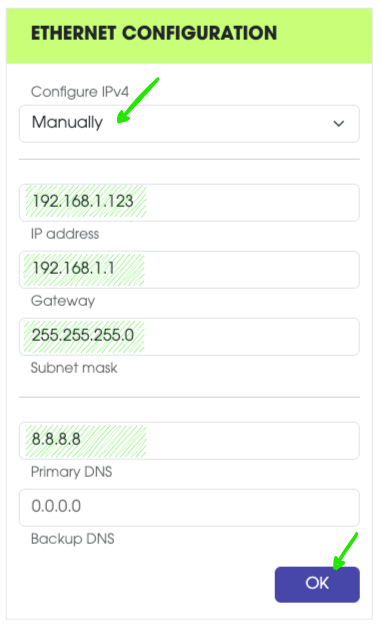
You can choose between two options for connecting your board to the network:
| Mode | Description |
|---|---|
| DHCP | The network automatically assigns an IP address to your board. (Recommended for most users.) |
| Static | You manually choose the IP address. If the address is already in use, it may cause network issues. Use this only if you know what you’re doing. |
To enable DHCP:
- Select DHCP from the drop-down menu.
- Click OK to save your settings.

To set a Static IP:
- Select Manually from the drop-down menu.
- Fill in all the required fields (IP address, subnet, gateway, etc.).
- Click OK to save your settings.
To apply the new configuration, the board must restart.
You can:
- Send a Reboot command from centui, or
- Turn the board off and back on manually.
After restarting, wait a few moments and then check that the board is still connected.